iOS项目中多target的配置
16 Jun 2016
背景
首先吐槽一下,最近公司接了几个功能相似的外包项目,整天累死累活真成了外包码农了。虽说奖金丰厚,但是这么着下去还真不是办法。
思路
功能相似,那就需要尽可能的多复用代码,目前考虑到的最理想的方案是基于multiple targets,就是利用多个target编译成不同的项目。这对于简单的替换界面风格的需求应该就可以满足了。
步骤
-
假设已经有一个项目
MultipleTargetTest。此时会有默认的targetMultipleTargetTest。相关的设置和操作不多说了。 -
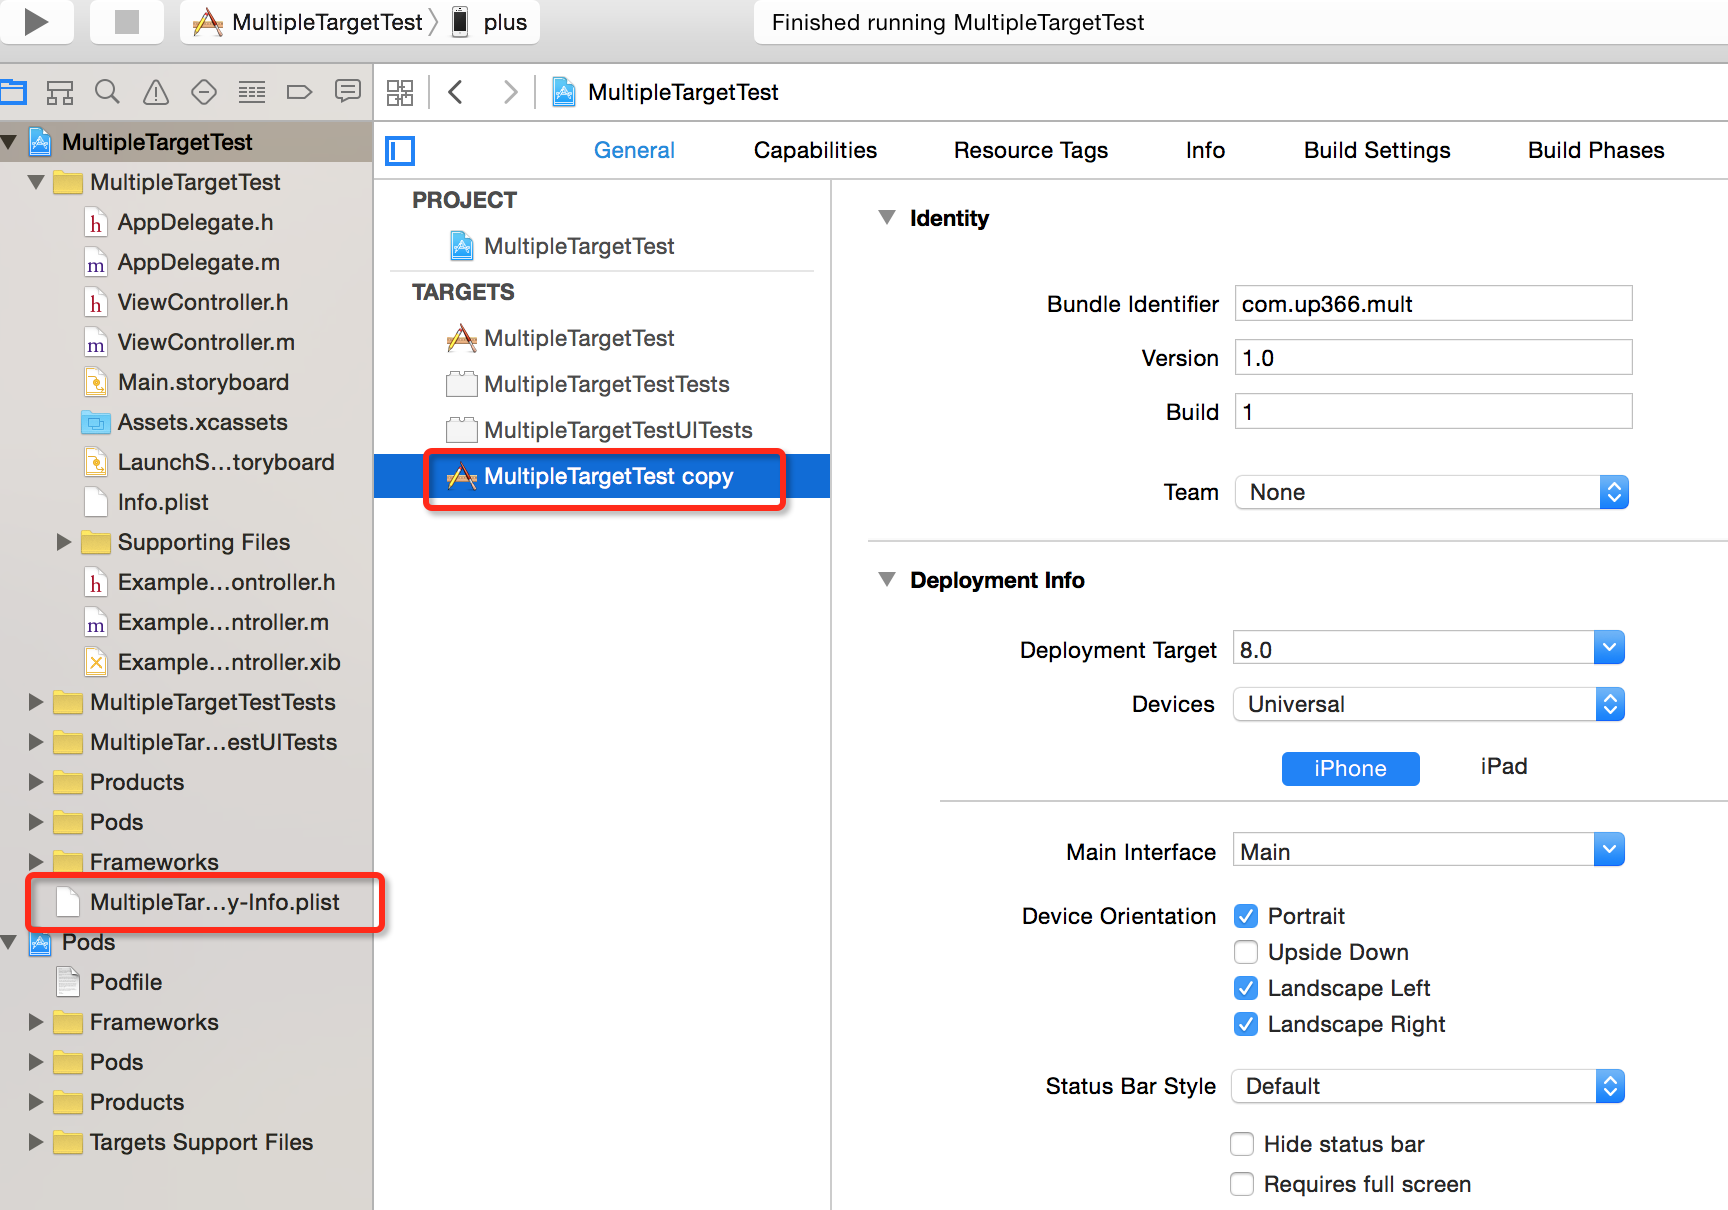
右键
targetMultipleTargetTest,然后选择Duplicate。此时会复制出一个targetMultipleTargetTest-copy和一个plist文件MultipleTargetTest-copy-info.plist。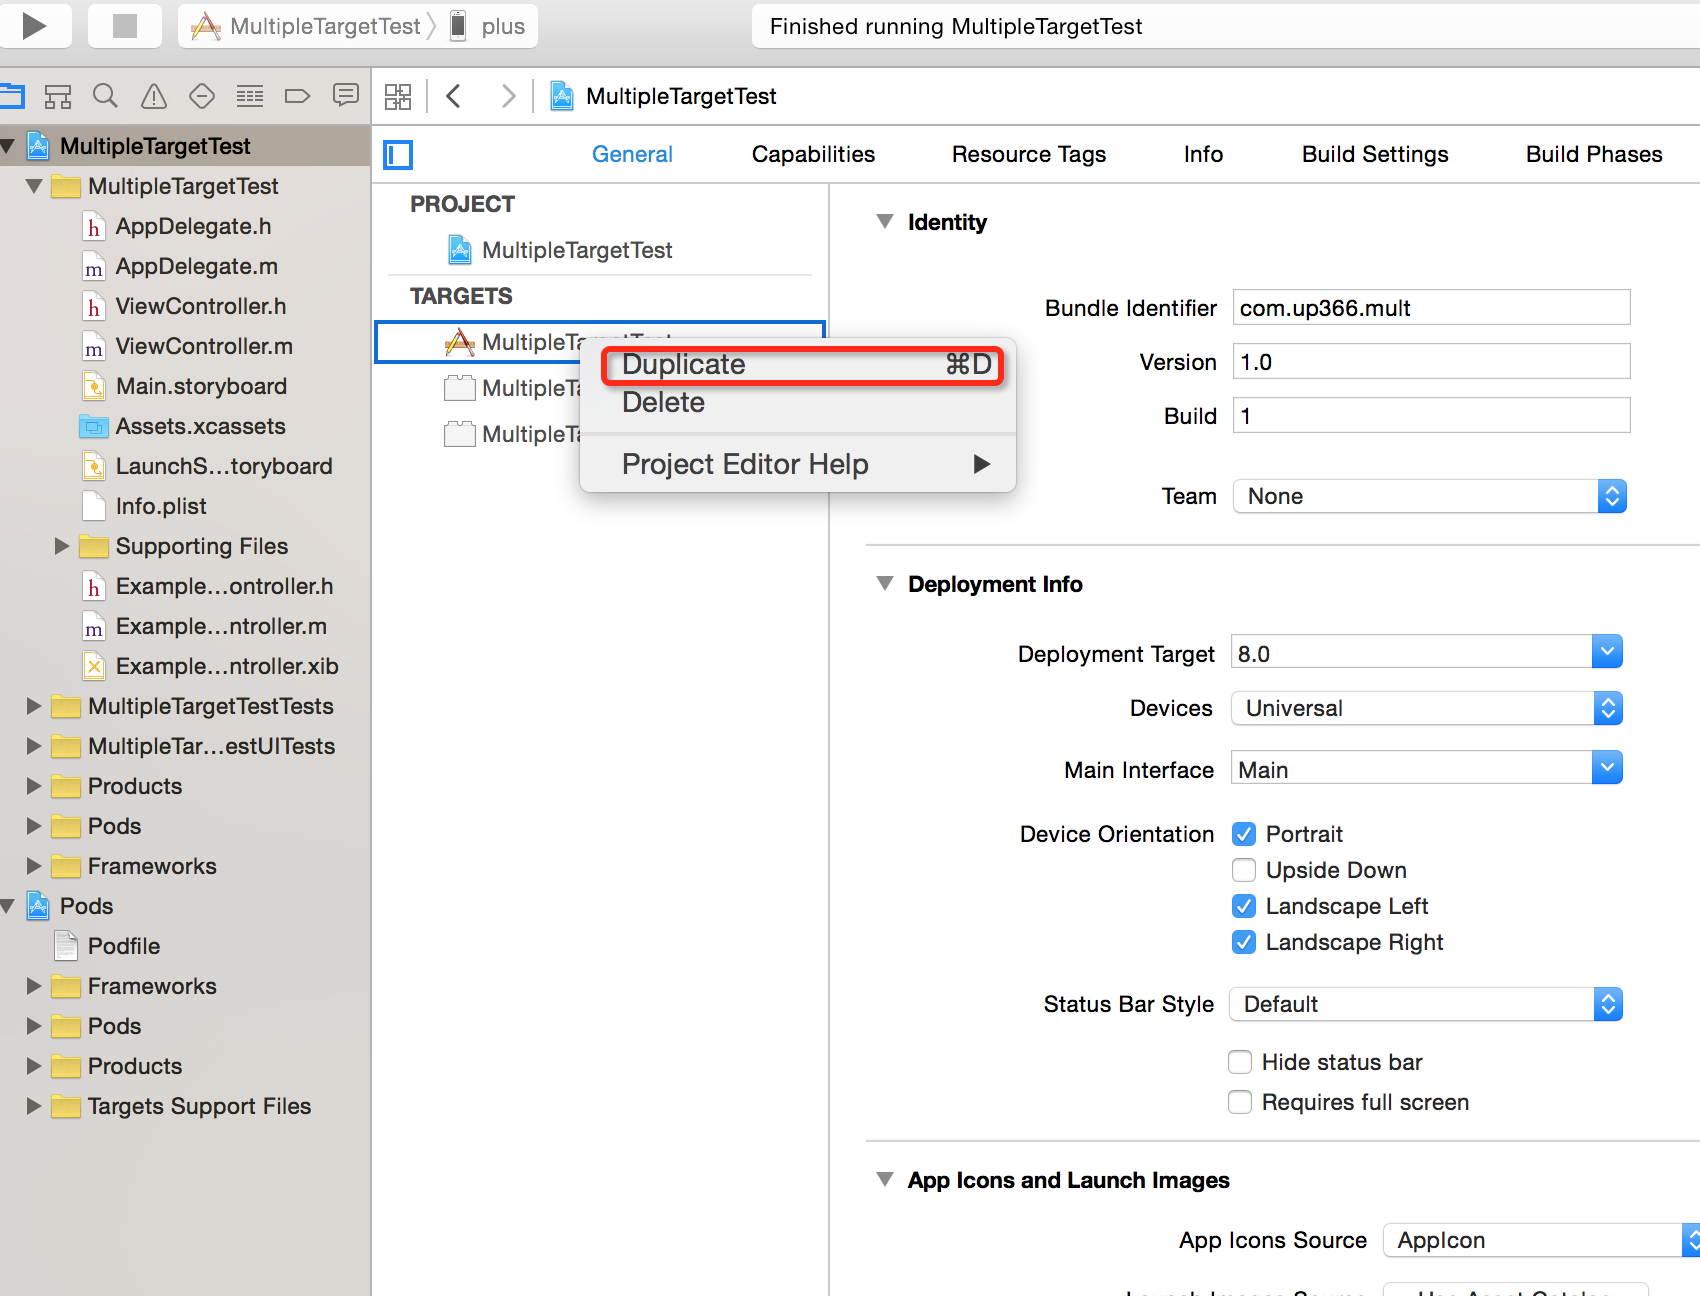
-
分别重命名
target和plist,并且Choose Info.plist File...,如图。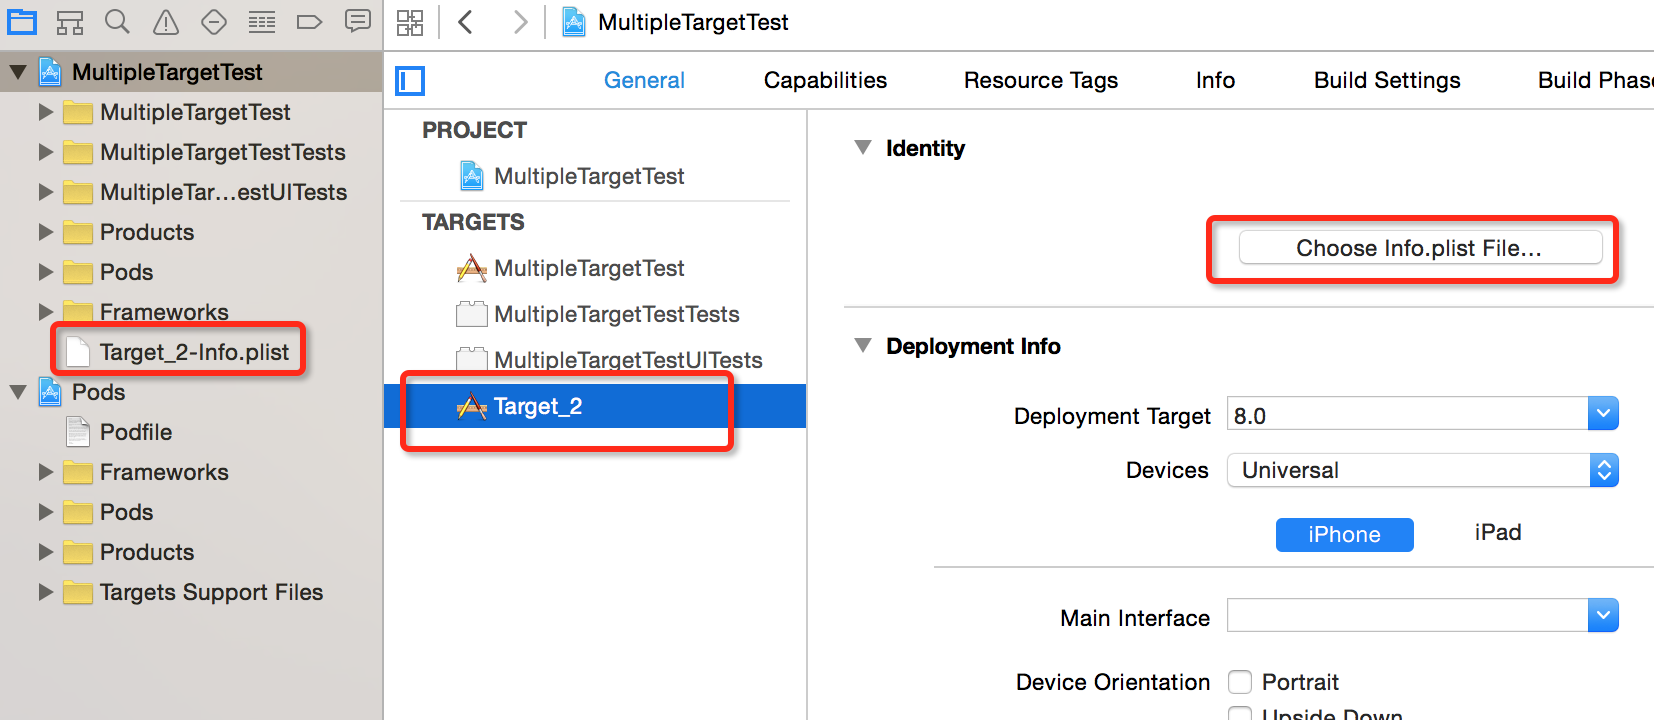
-
在
Manage Schemes中修改scheme。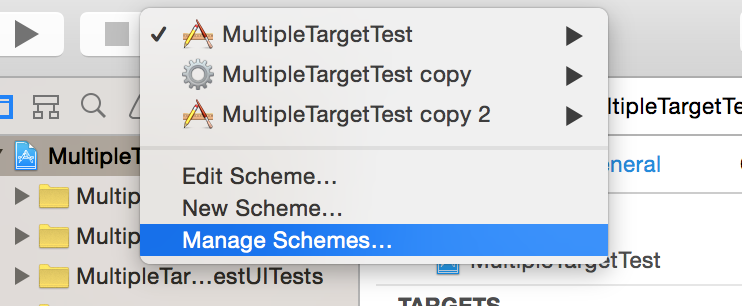
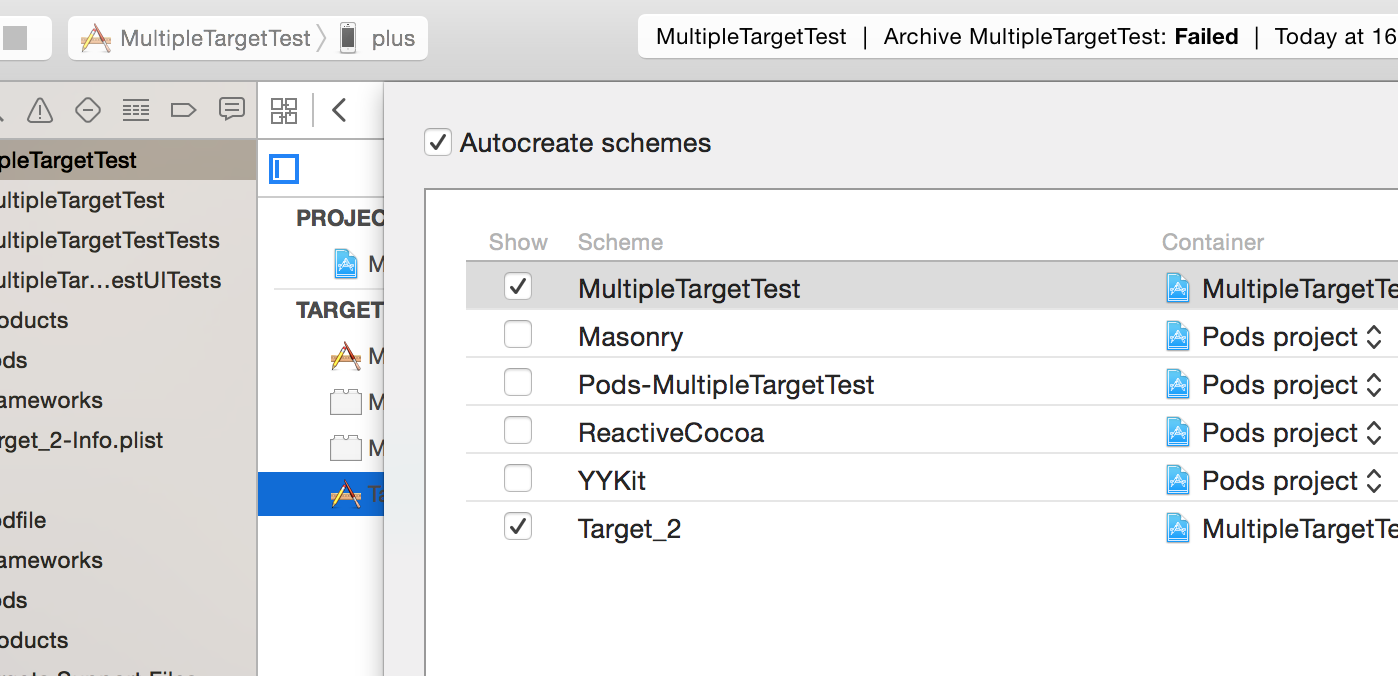
-
当然也要修改
Target_2的Bundle Identifier。同时在Build Settings中也要确认相应的配置一致。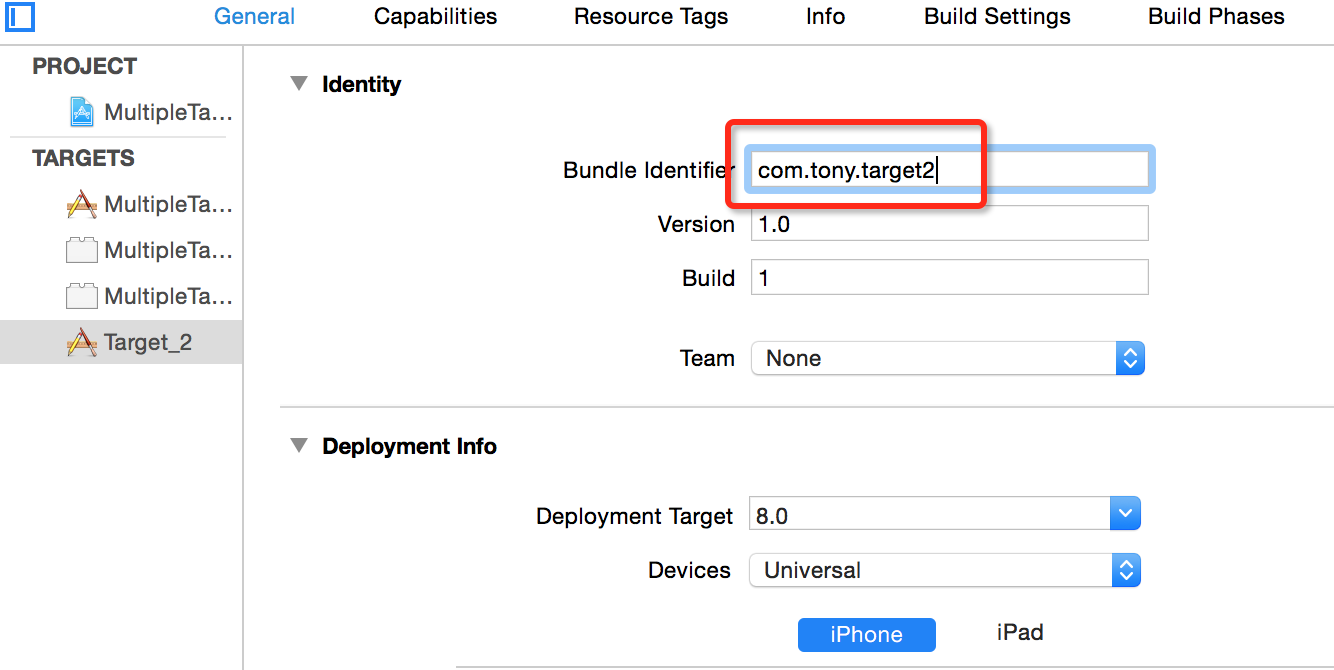

-
Build Settings中搜索Other C Flags添加-DMULTIPLE_TARGETS_TARGET2。然后在代码中使用这个宏,来进行条件编译的操作了。具体看后面的代码。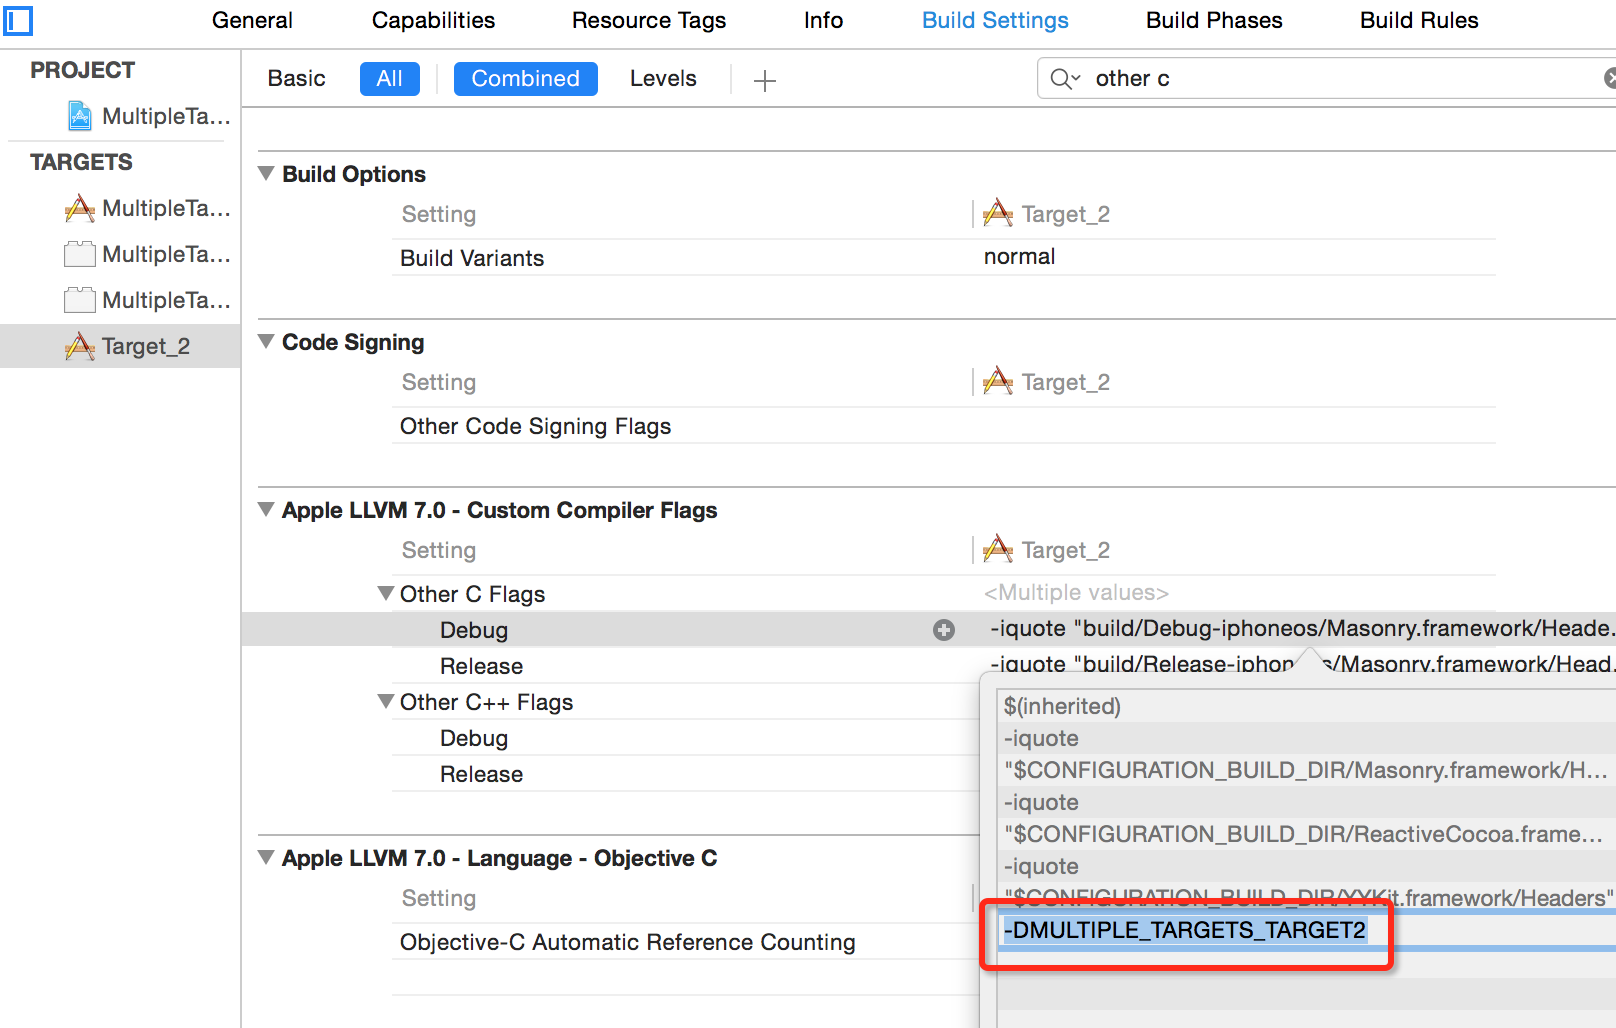
- 根据需求修改
Target_2-Info.plist文件。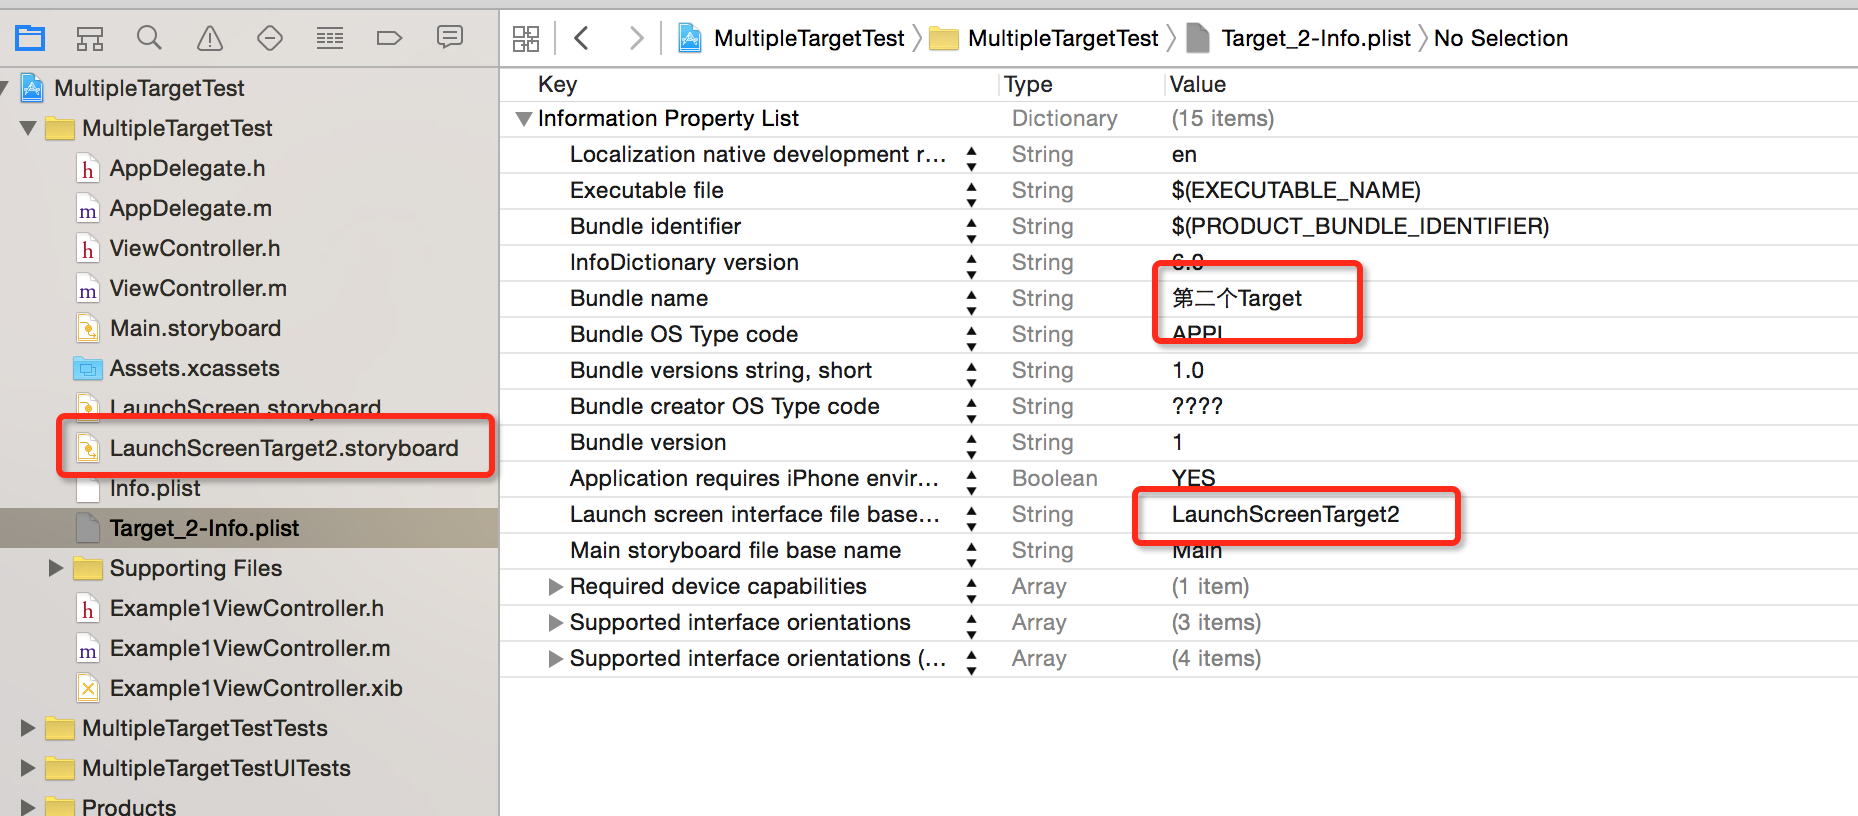 此处需要注意:
新添加的
LaunchScreenTarget2.storyboard需要在Build Phases中添加,当然不需要的LaunchScreen.storyboard最好也移除。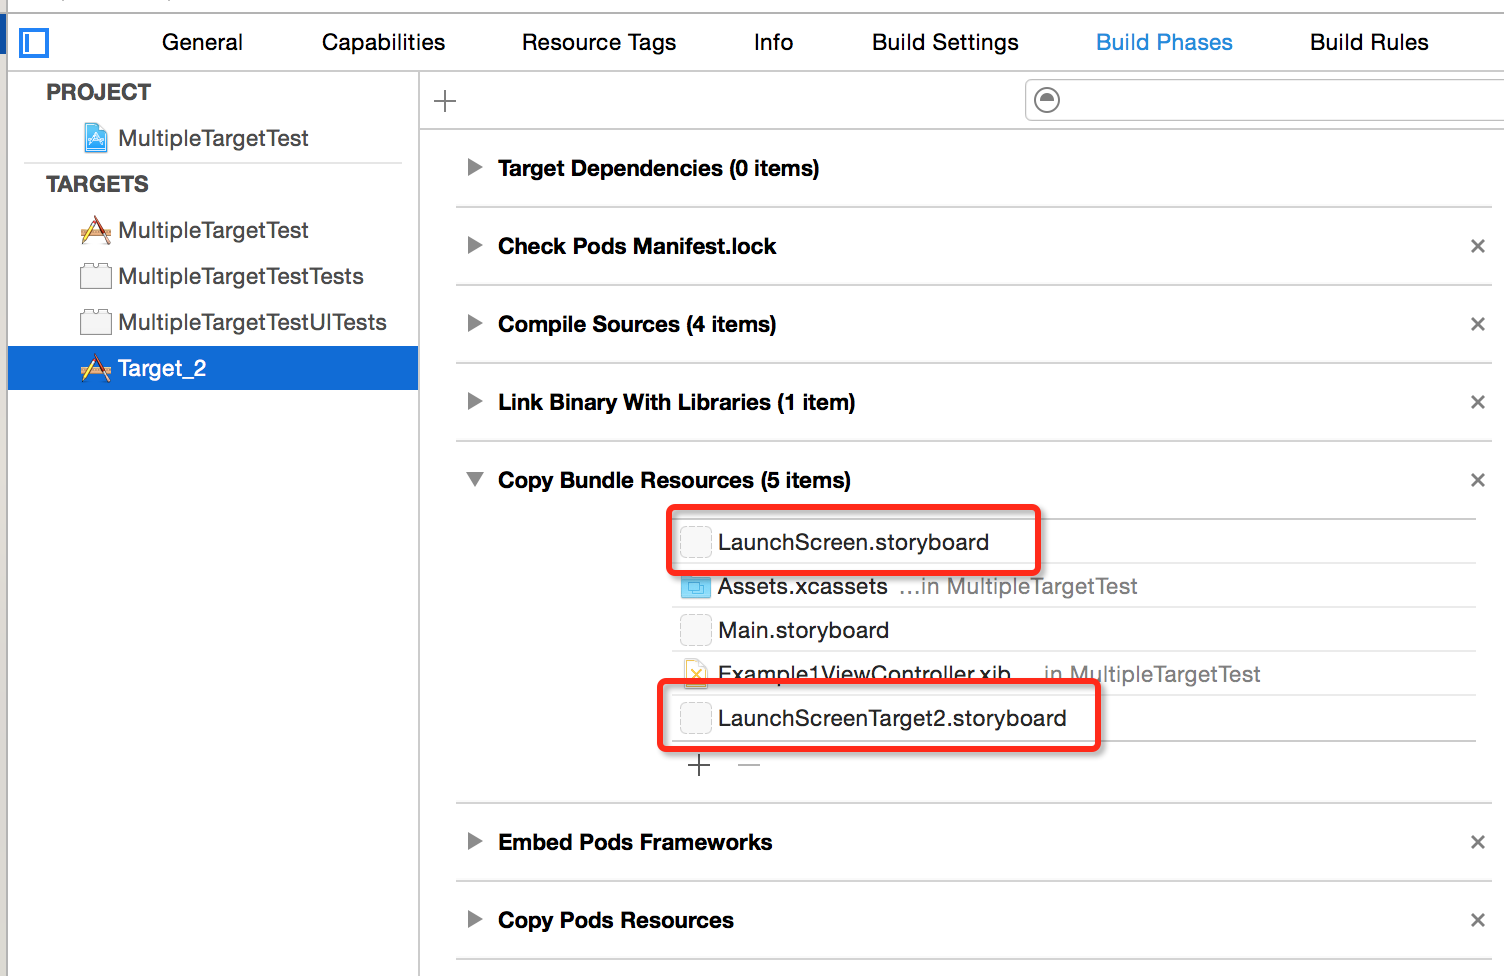
-
可以修改
LaunchScreenTarget2.storyboard然后选择不同的target进行调试。 -
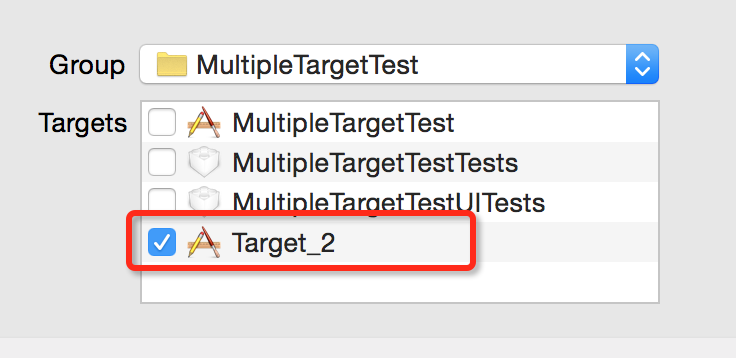
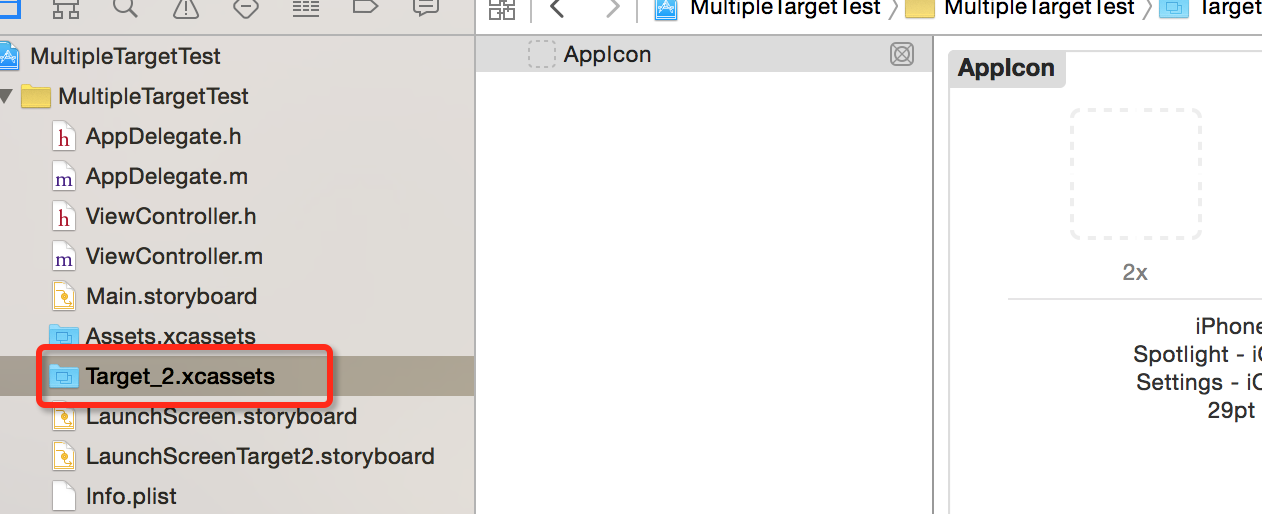
对于应用中的图标和图片资源,可以新建资源目录。json文件复制过去就可以了。同样需要在
Build Phases配置。推荐共同资源放在Assets中,然后不同target再包含不同的资源目录。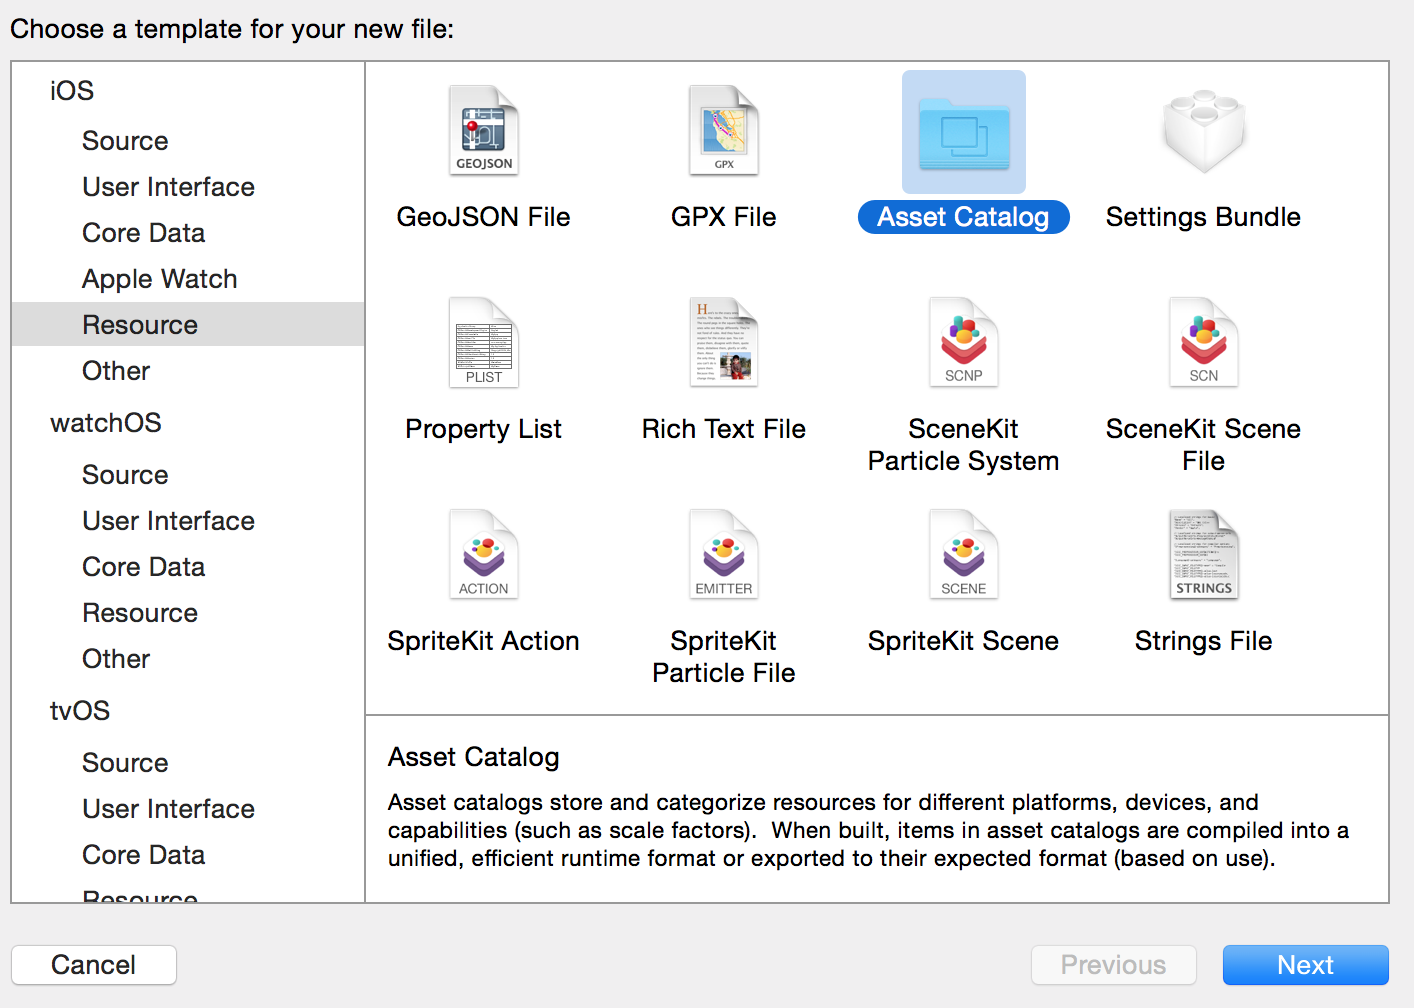
- 对于
Podfile,可以这么配置。
platform :ios, '8.0'
use_frameworks!
# ignore all warnings from all pods
inhibit_all_warnings!

def myPods
    pod 'Masonry',  '~> 0.6.4'
    pod 'YYKit', '~> 1.0.7'
    pod 'ReactiveCocoa', '~> 2.5'
end

target 'MultipleTargetTest' do
    myPods
end

target 'Target_2' do
    myPods
end
此时可能有这样的警告,直接构建应该没问题,不过我还是解决掉比较保险。
[!] CocoaPods did not set the base configuration of your project because your
project already has a custom config set. In order for CocoaPods integration to
work at all, please either set the base configurations of the target
`Target_2` to `Pods/Target Support Files/Pods-Target_2/Pods-Target
_2.debug.xcconfig` or include the `Pods/Target Support Files/Pods-Target_2/
Pods-Target_2.debug.xcconfig` in your build configuration.
stackoverflow上有人提出了解决方案(貌似pod update --no-repo-update也可以)。
what fixed it for me was to change the configuration file setting to None for the two Pods-related targets, then run pod install again.
11.代码中使用宏-DMULTIPLE_TARGETS_TARGET2的示例,可以根据不同targets来进行条件编译啦。
#pragma mark - MULTIPLE_TARGETS_TARGET2
    //Build Setting
    //Other C Flags
    //-MULTIPLE_TARGETS_TARGET2
#ifdef MULTIPLE_TARGETS_TARGET2
    NSLog(@"MULTIPLE_TARGETS_TARGET2");
#else
    NSLog(@"MultipleTargetTest");
#endif
12.如果代码中使用了Swift混编,则有可能出错。原因多半是没有生成XXX-Bridging-Header.h头文件,或之前生成的XXX-Bridging-Header.h没有设置为桥接文件。
#ifdef MULTIPLE_TARGETS_TARGET2
#import "Target_2-Swift.h"
#else
#import "MultipleTargetTest-Swift.h"
#endif
代码:
文章中的代码都可以从我的GitHub MultipleTargetTest找到。
参考资料:
感谢小徒弟帮忙整理的资料。