iOS资源的加载
31 Mar 2016
前言
最近遇到了加载本地资源文件的场景,当然从沙盒中获取资源比较容易理解,可是从程序中访问资源文件就经常遇到WebView加载不了的情况。于是整理了一下。
沙盒获取资源
沙盒目录主要有:
-
Documents 目录:您应该将所有de应用程序数据文件写入到这个目录下。这个目录用于存储用户数据或其它应该定期备份的信息。
-
AppName.app 目录:这是应用程序的程序包目录,包含应用程序的本身。由于应用程序必须经过签名,所以您在运行时不能对这个目录中的内容进行修改,否则可能会使应用程序无法启动。
-
Library 目录:这个目录下有两个子目录:Caches 和 Preferences。Preferences 目录:包含应用程序的偏好设置文件。您不应该直接创建偏好设置文件,而是应该使用NSUserDefaults类来取得和设置应用程序的偏好。Caches 目录:用于存放应用程序专用的支持文件,保存应用程序再次启动过程中需要的信息。
-
tmp 目录:这个目录用于存放临时文件,保存应用程序再次启动过程中不需要的信息。
获取这些目录路径的方法:
- 获取家目录路径的函数:
NSString *homeDir = NSHomeDirectory();
- 获取Documents目录路径的方法:
NSArray *paths = NSSearchPathForDirectoriesInDomains(NSDocumentDirectory, NSUserDomainMask, YES);
NSString *docDir = [paths objectAtIndex:0];
- 获取Caches目录路径的方法:
NSArray *paths = NSSearchPathForDirectoriesInDomains(NSCachesDirectory, NSUserDomainMask, YES);
NSString *cachesDir = [paths objectAtIndex:0];
- 获取tmp目录路径的方法:
NSString *tmpDir = NSTemporaryDirectory();
获取程序资源
NSString *imagePath = [[NSBundle mainBundle] pathForResource:@”apple” ofType:@”png”];
UIImage *appleImage = [[UIImage alloc] initWithContentsOfFile:imagePath];
可能遇到的坑:
- 将文件的文件夹拖入项目目录,如果选择
Create groups,如下图:
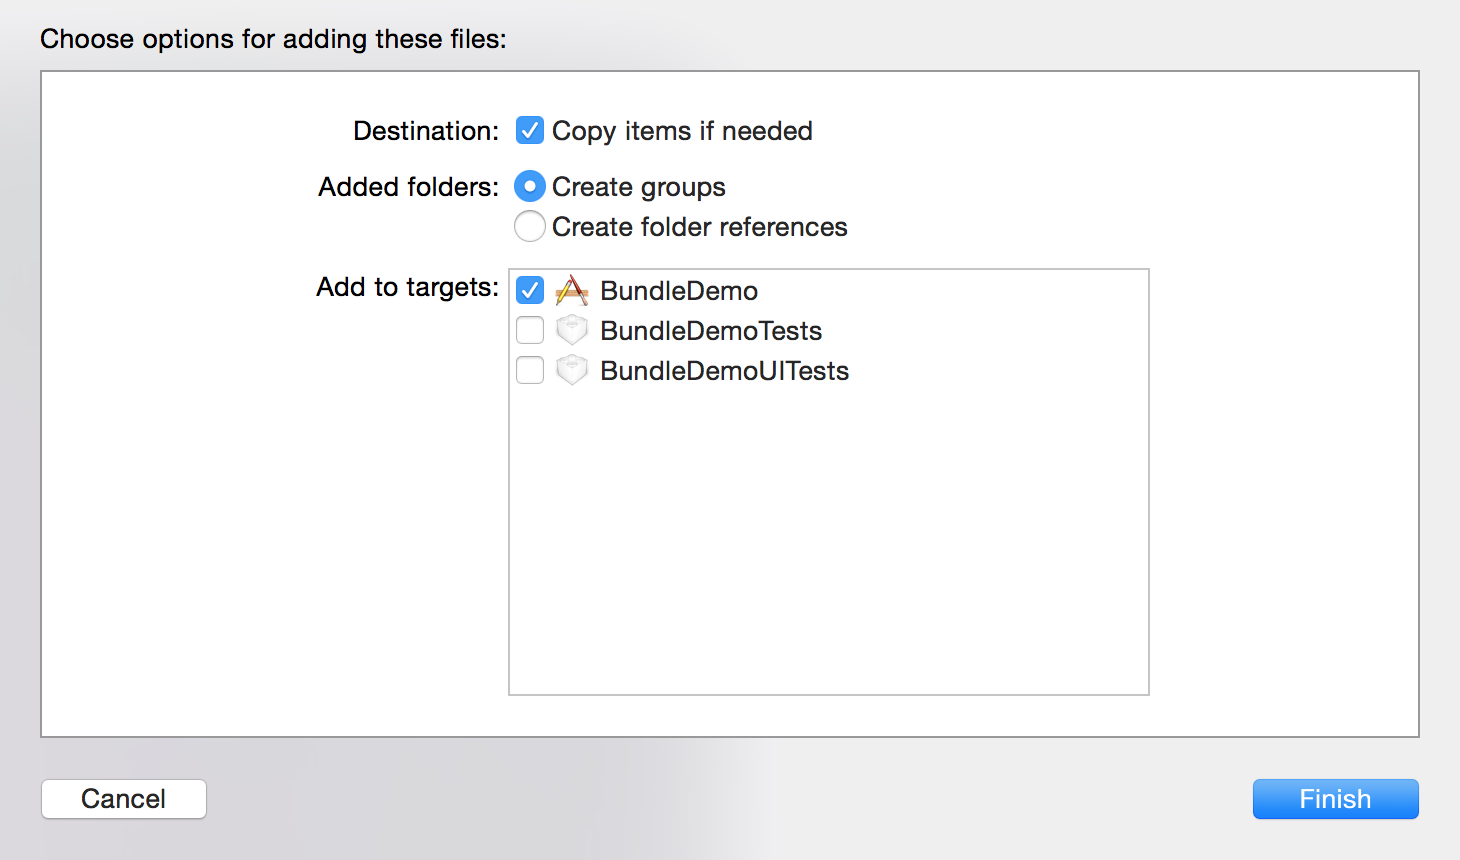
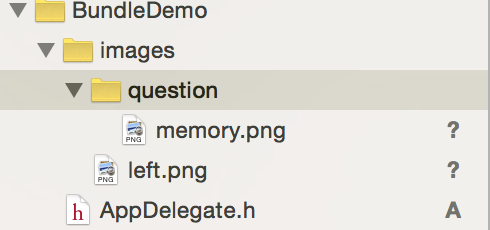
//使用Create Groups
NSString *filePath0 = [[NSBundle mainBundle] pathForResource:@"left" ofType:@"png" inDirectory:@"images"];
NSLog(@"%@", filePath0);
上面的代码将输出 null,必须使用下面不加 inDirectory 的方式才能加载到。
NSString *filePath = [[NSBundle mainBundle] pathForResource:@"left" ofType:@"png"];
NSData *imageData = [NSData dataWithContentsOfURL:[NSURL fileURLWithPath:filePath]];
self.image.image = [UIImage imageWithData:imageData];

NSString *filePath2 = [[NSBundle mainBundle] pathForResource:@"memory" ofType:@"png"];
NSData *imageData2 = [NSData dataWithContentsOfURL:[NSURL fileURLWithPath:filePath2]];
self.questionView.image = [UIImage imageWithData:imageData2];
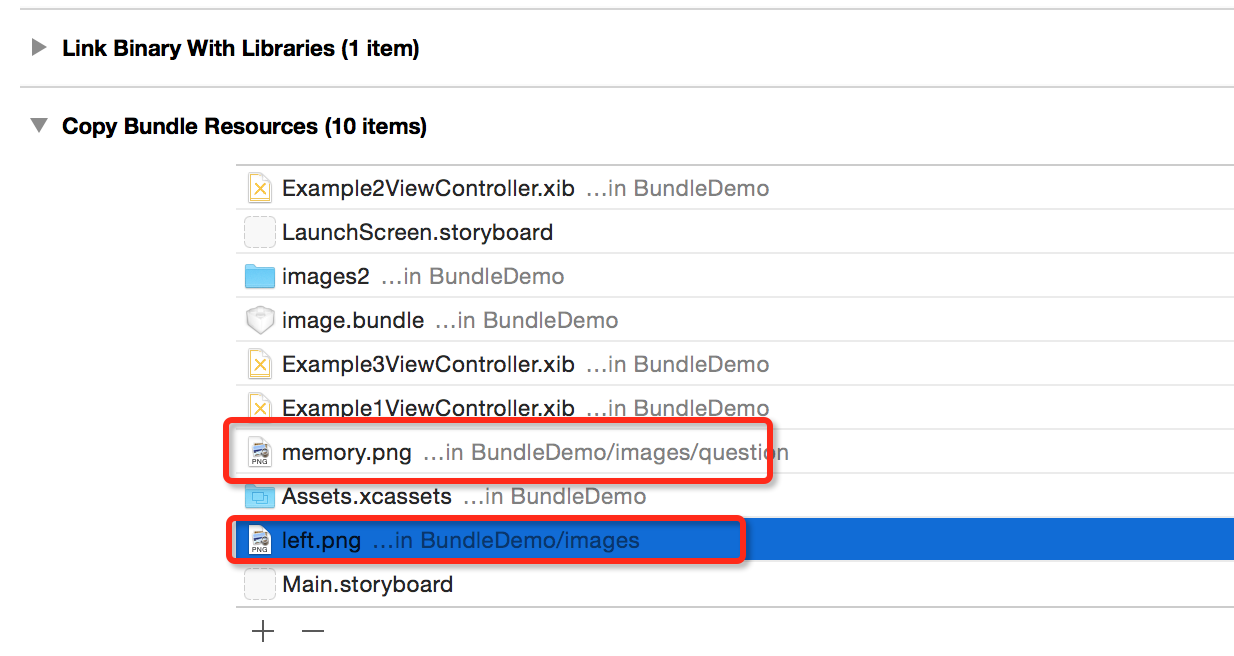
通过mainBundle获得的NSBundle对象,就是这个项目的根目录,使用groups来管理,资源文件依然存在于项目的rootFolder根目录中。如图:
- 将文件的文件夹拖入项目目录,如果选择
Create folder references,如下图:
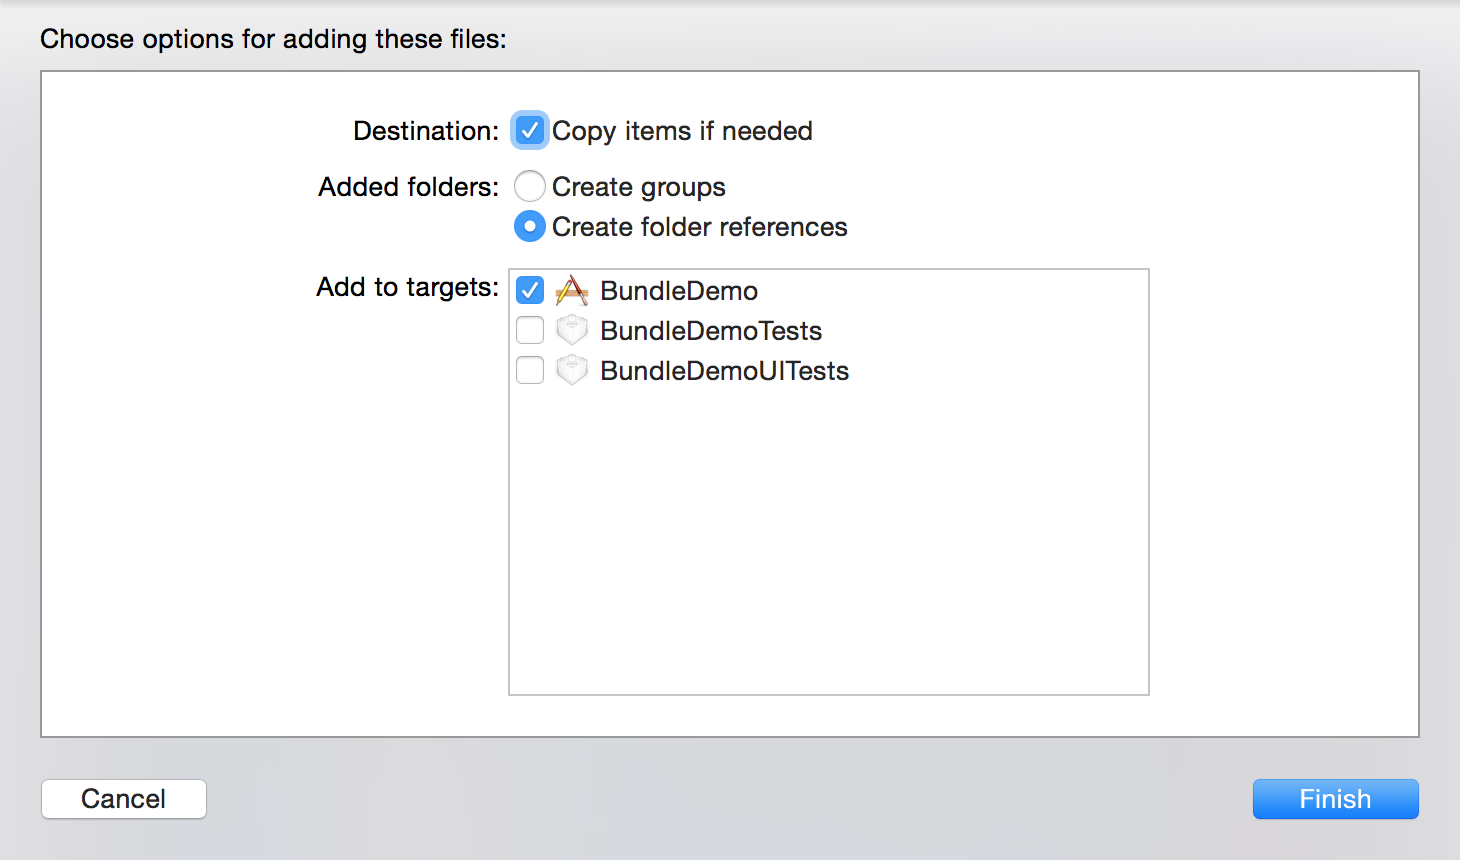
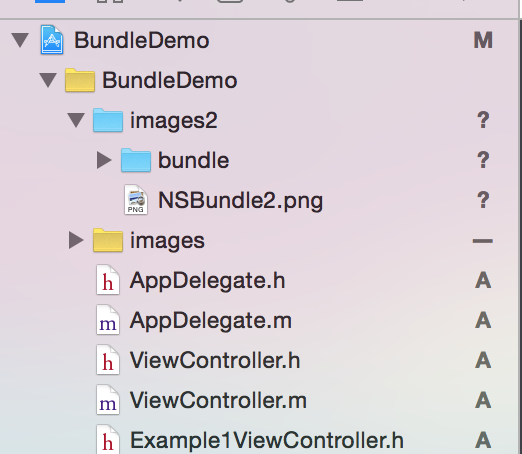
此时必须添加inDirectory参数。
NSString *filePath = [[NSBundle mainBundle] pathForResource:@"NSBundle2" ofType:@"png" inDirectory:@"images2"];
NSData *imageData = [NSData dataWithContentsOfURL:[NSURL fileURLWithPath:filePath]];
self.imageView.image = [UIImage imageWithData:imageData];
使用NSBundle管理资源
新建一个文件夹image,并将文件夹的后缀命名为image.bundle,再将所需要的资源文件加入到这个bundle中,然后将这个bundle文件导入到项目中。(貌似此时无论怎么选择,子文件夹都是Create folder references状态)。
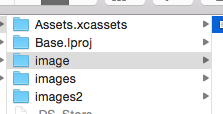
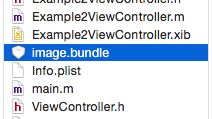
// 获取NSBundle文件的Path
NSString * imgBundlePath = [[NSBundle mainBundle] pathForResource:@"image" ofType:@"bundle"];
// 使用Path地址新建一个NSBundle对象
NSBundle *imgBundle = [NSBundle bundleWithPath:imgBundlePath];

NSString *filePath = [imgBundle pathForResource:@"bundle4" ofType:@"png"];
NSData *imageData = [NSData dataWithContentsOfURL:[NSURL fileURLWithPath:filePath]];
self.imageView.image = [UIImage imageWithData:imageData];

NSString *filePath2 = [imgBundle pathForResource:@"bundle5" ofType:@"png" inDirectory:@"res"];
NSData *imageData2 = [NSData dataWithContentsOfURL:[NSURL fileURLWithPath:filePath2]];
self.imageView2.image = [UIImage imageWithData:imageData2];
代码:
文章中的代码都可以从我的GitHub BundleDemo找到。